Notification
INTRODUCTION
The Notification feature helps developers to send essential updates to the users during the experience with the Mini App. This guide will show you how to register and set up the Notification feature on Mini App Center.
How to access
- Login to Mini App Center
- Open a Mini App Detail page
- Choose Management > Notification List
REGISTER NOTIFICATION FEATURE
Users must register the Notification feature before accessing the Notification Templates.
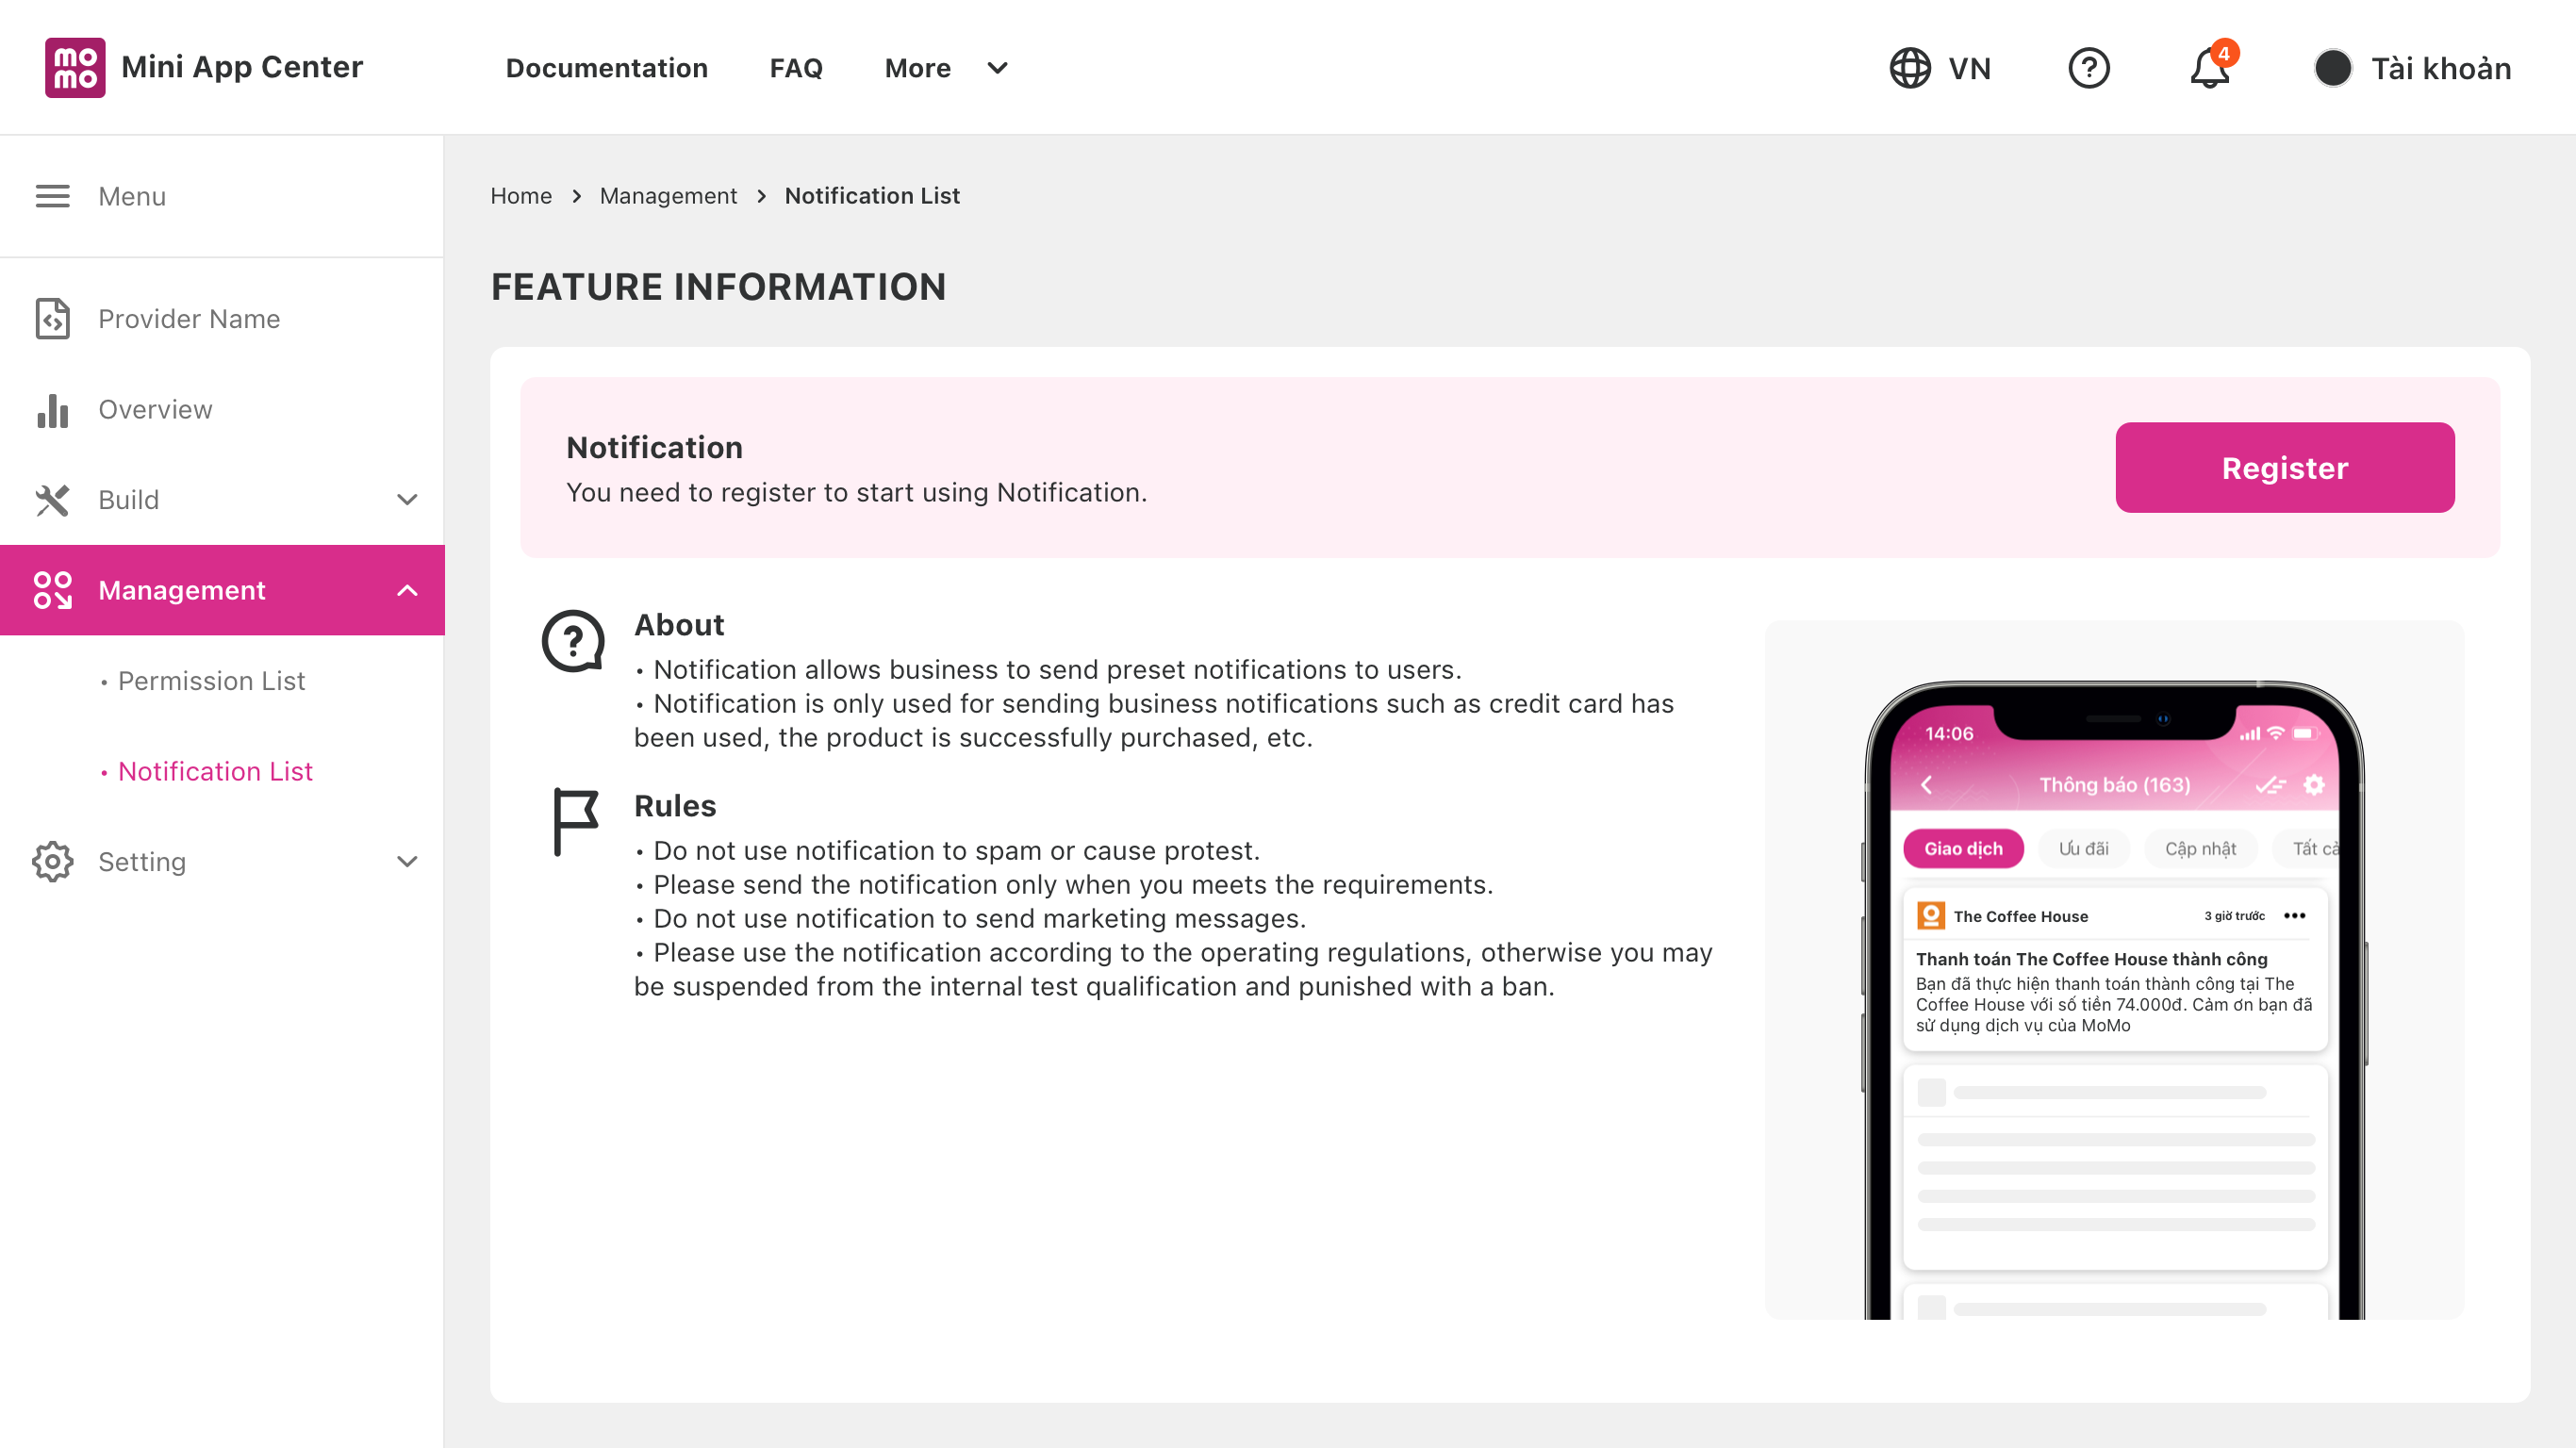
First, log in to Mini App Center and open the Mini App Detail page. On the Mini App Detail page, choose Management > Notification List.
Select Register on the Feature Information page to create a feature registration request.
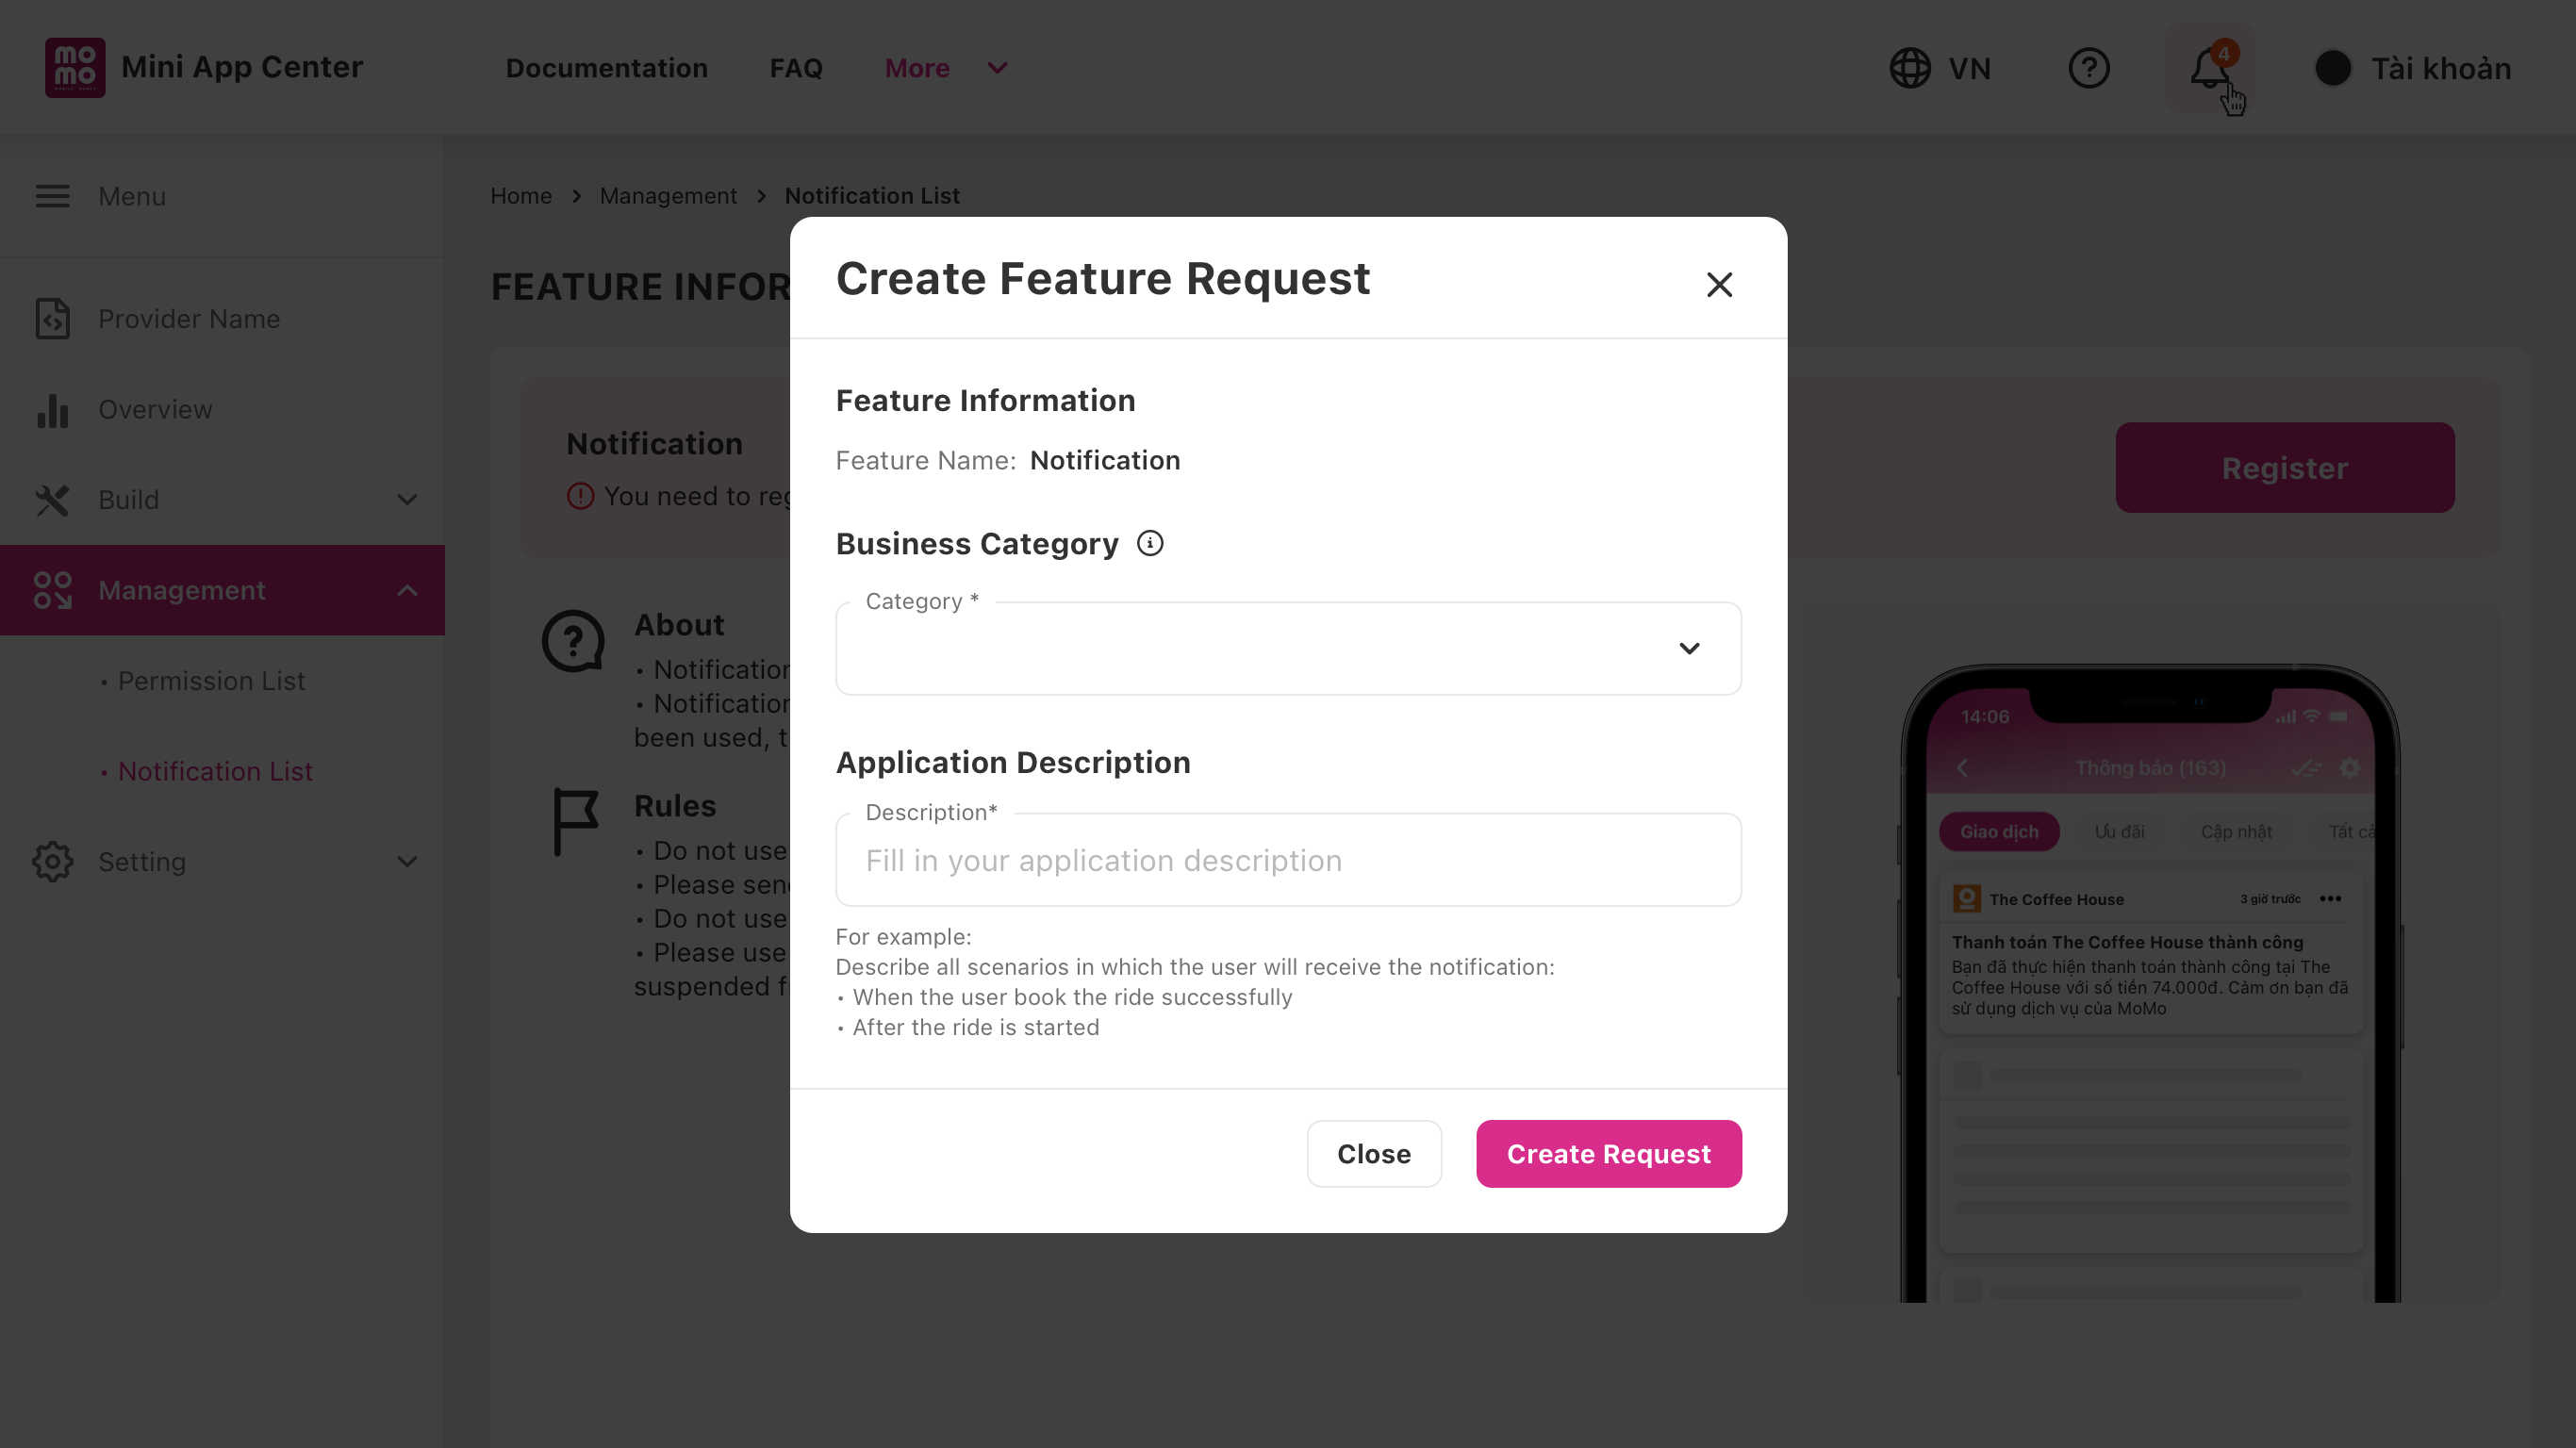
A feature request form will pop up. Fill the information into the form and click Create Request.
In the Application Description text area, you must describe all scenarios where the user will receive the notification. These scenarios should be based on the user flow of the Mini App, which will help the reviewer to understand the purpose of using the Notification feature.
Here is a sample for the application description:
- Type of service: Logistics Delivery service.
- Application Description sample:
- “The notification is triggered in the following scenarios:
- The user successfully/fails to create a delivery order.
- There is no driver to accept the delivery order.
- A driver has accepted the delivery order.
- The delivery order is on the way to the recipient.
- The delivery order has been completed”.
- “The notification is triggered in the following scenarios:
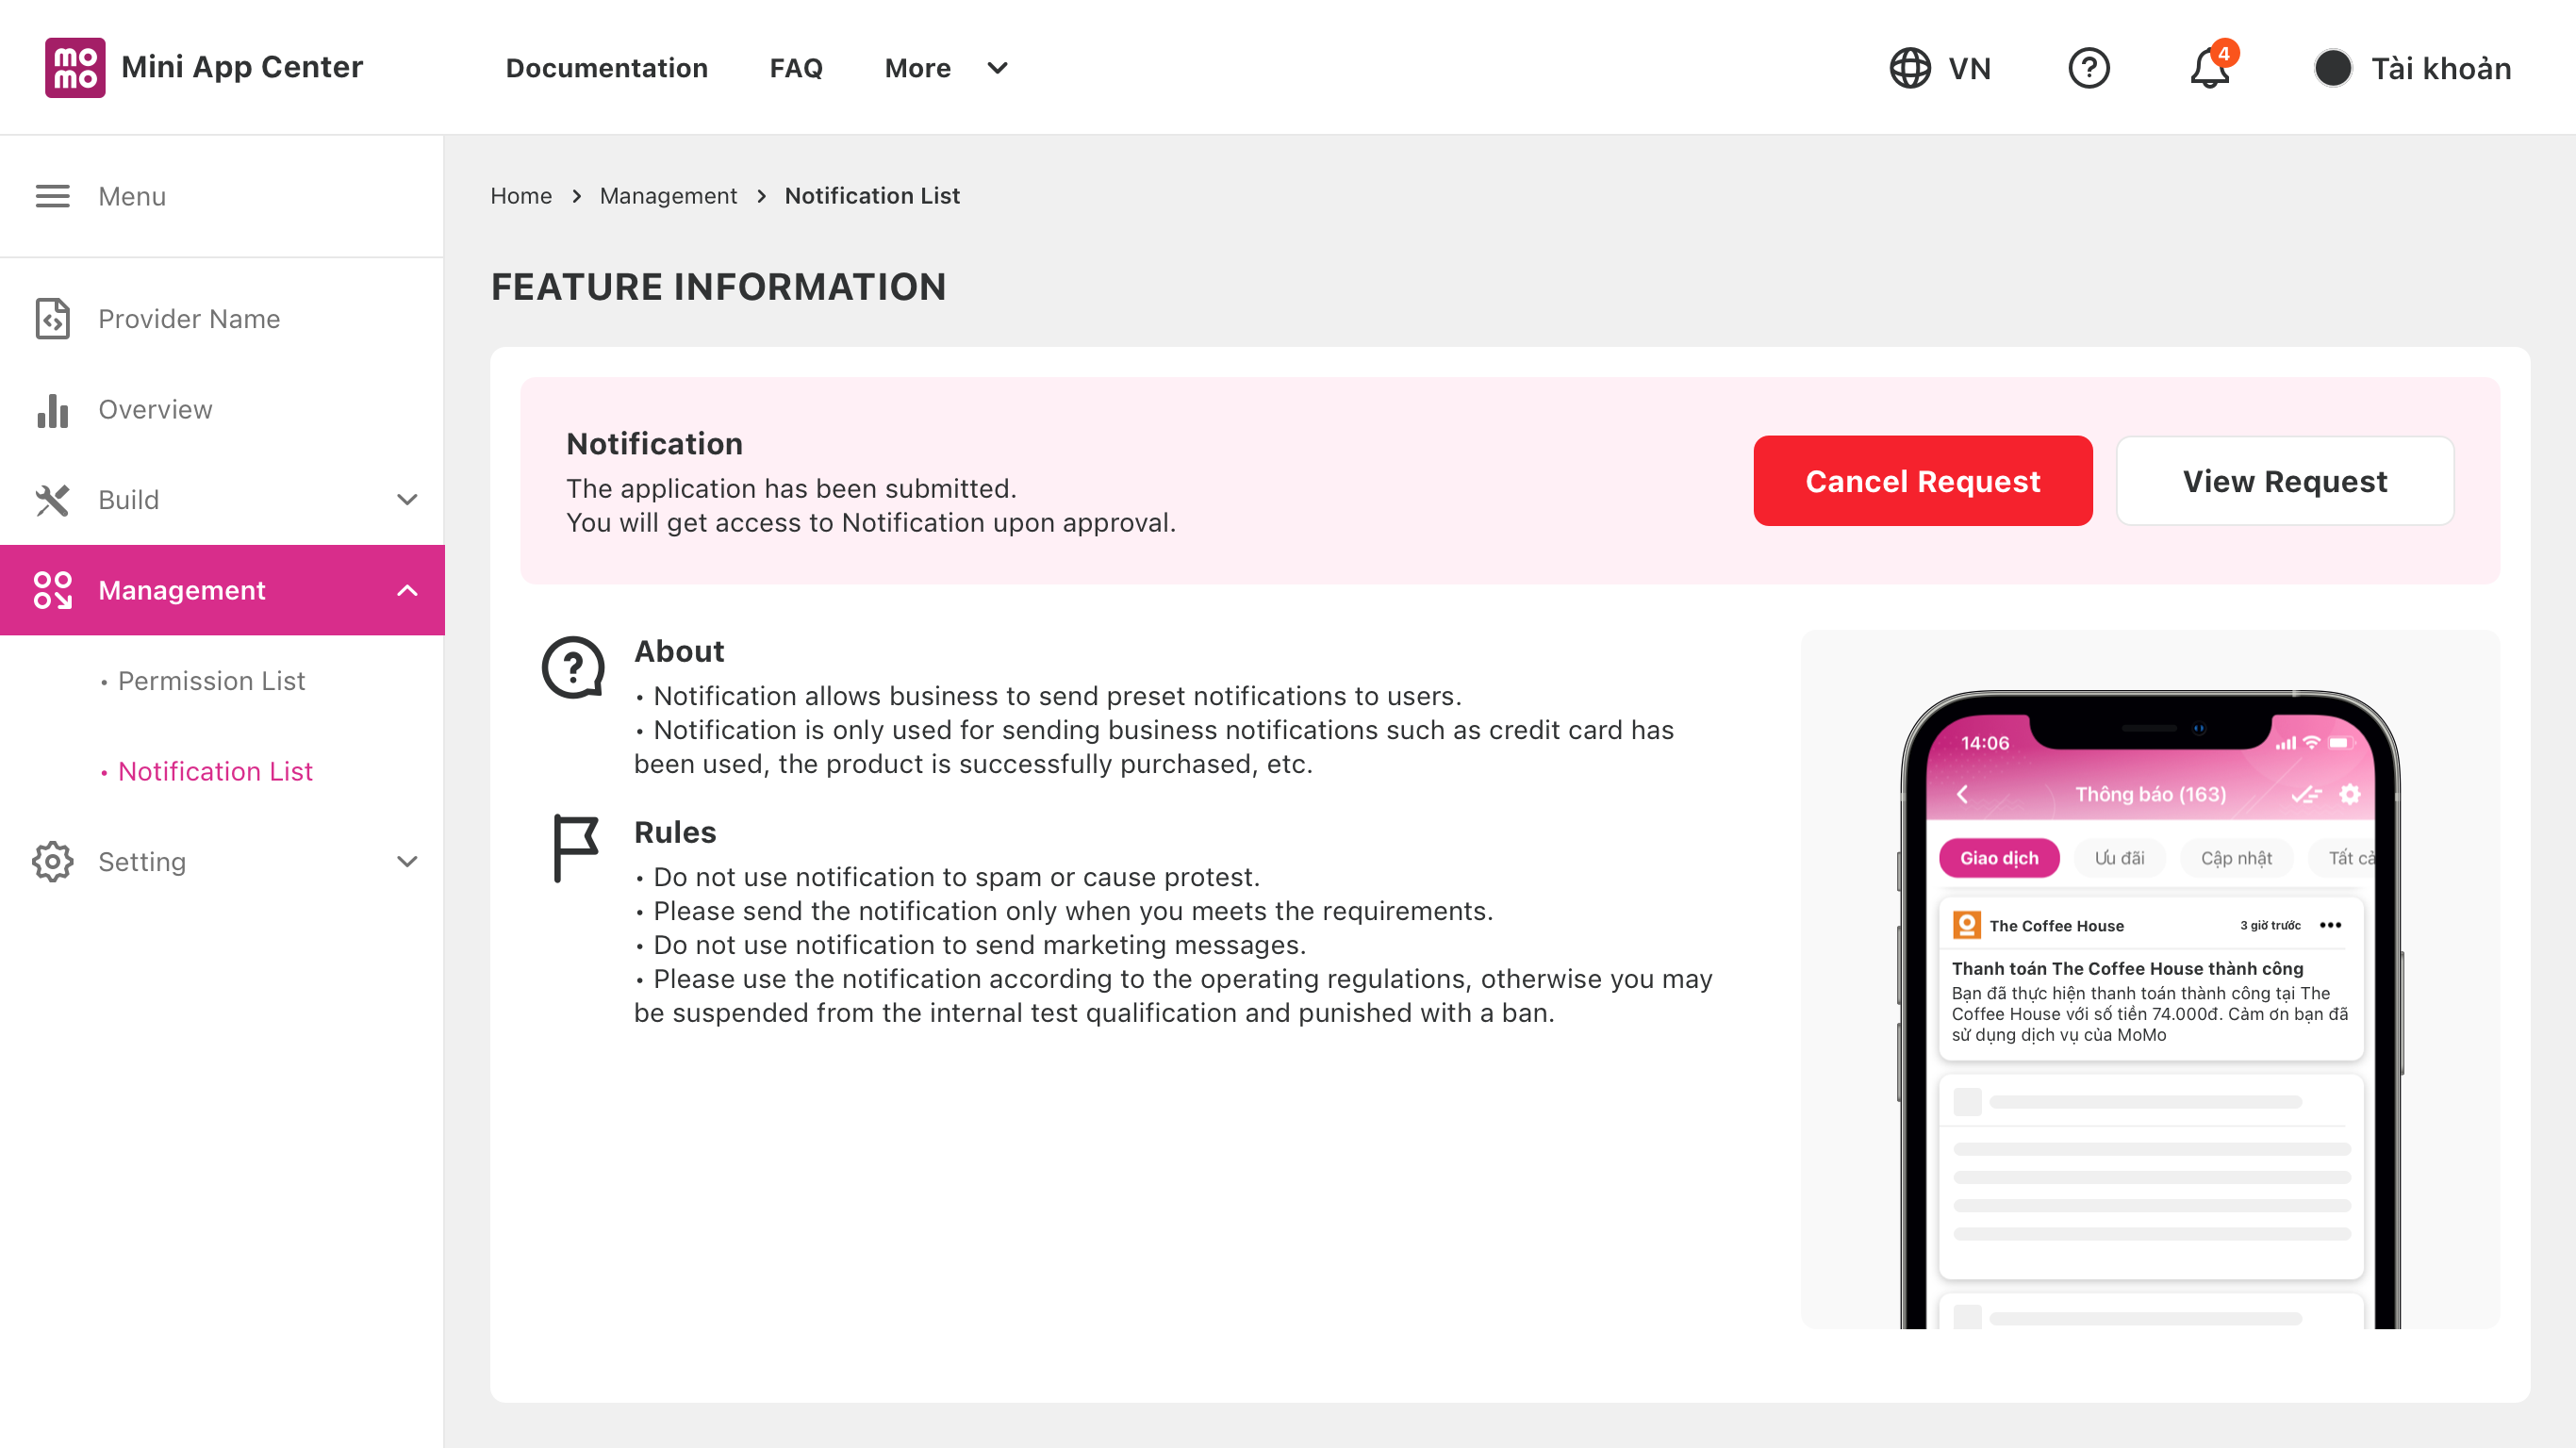
After the request is created, the MoMo reviewer will process the request. You can cancel the request by clicking on the** Cancel Request **button. Click on **View Request **if you want to view the information of the request that you created.
The MoMo reviewer will respond to the request with one of the following results:
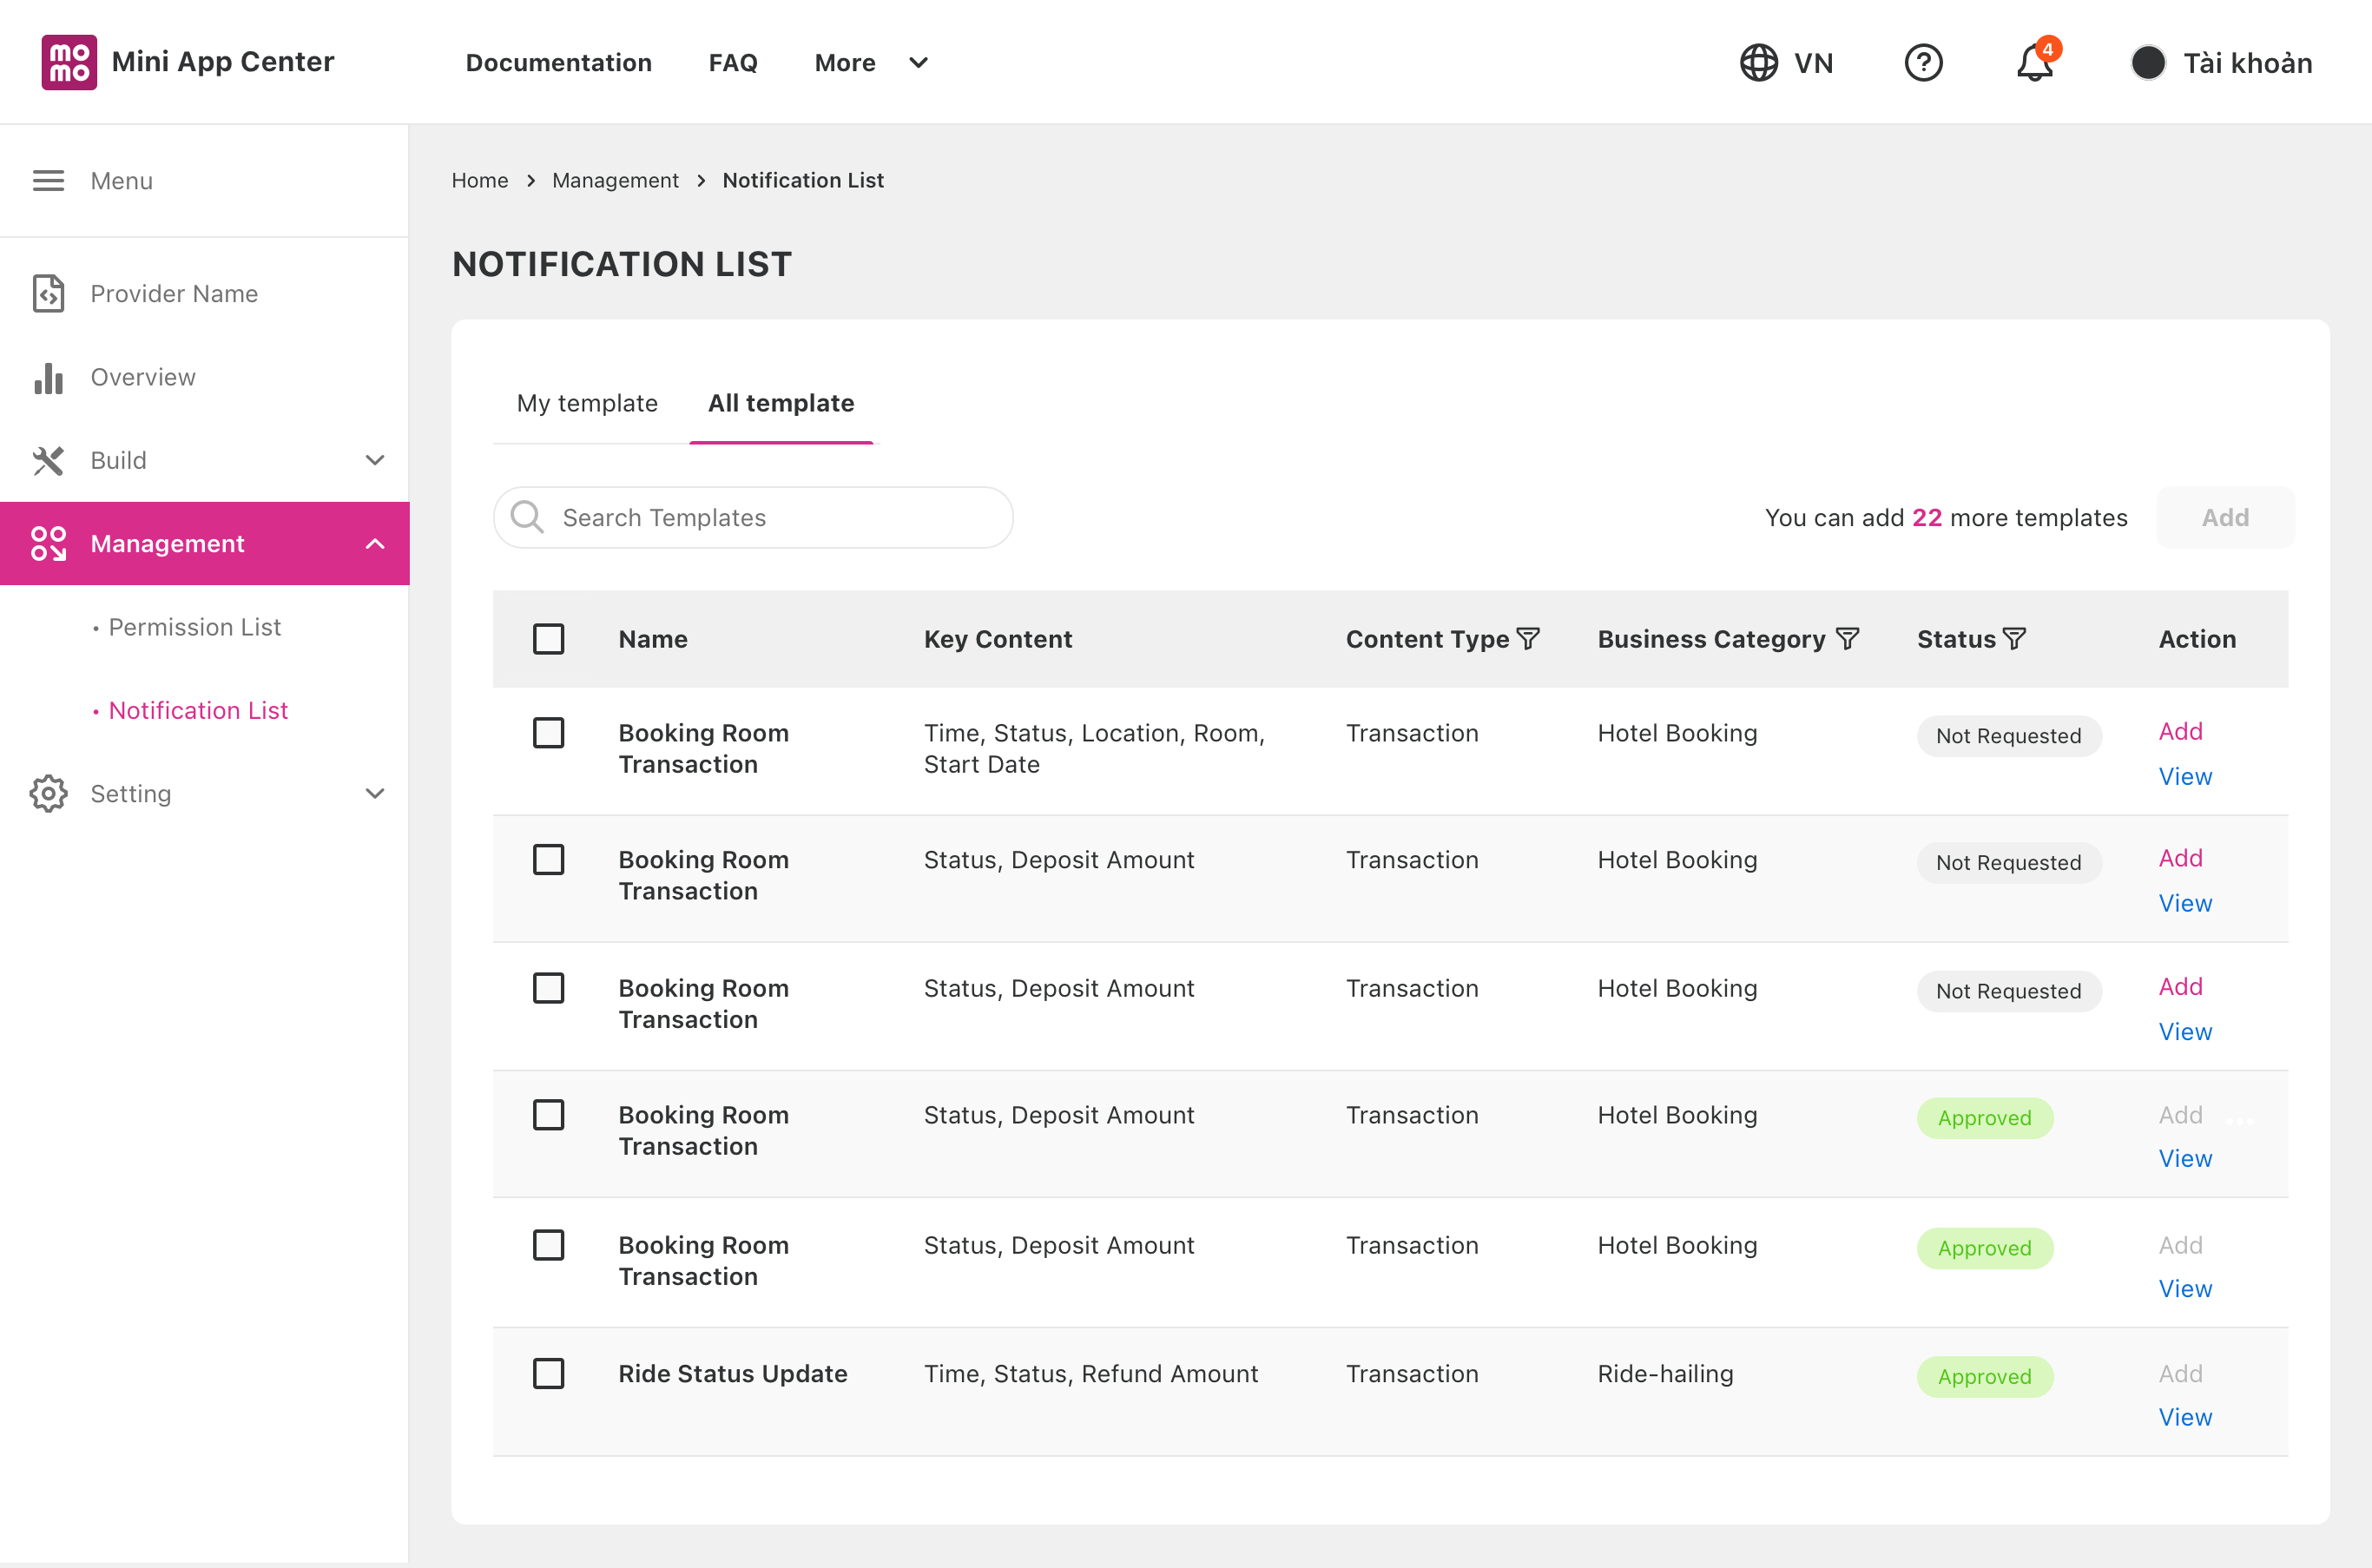
- Approved: The request is approved. The developer will have access to the Notification Templates list to start using the feature.
- Rejected: The request is rejected. The developer will not have access to the Notification Templates list. They can choose Register to create another request or choose View Request to see why their request is rejected.
The Notification feature request is approved
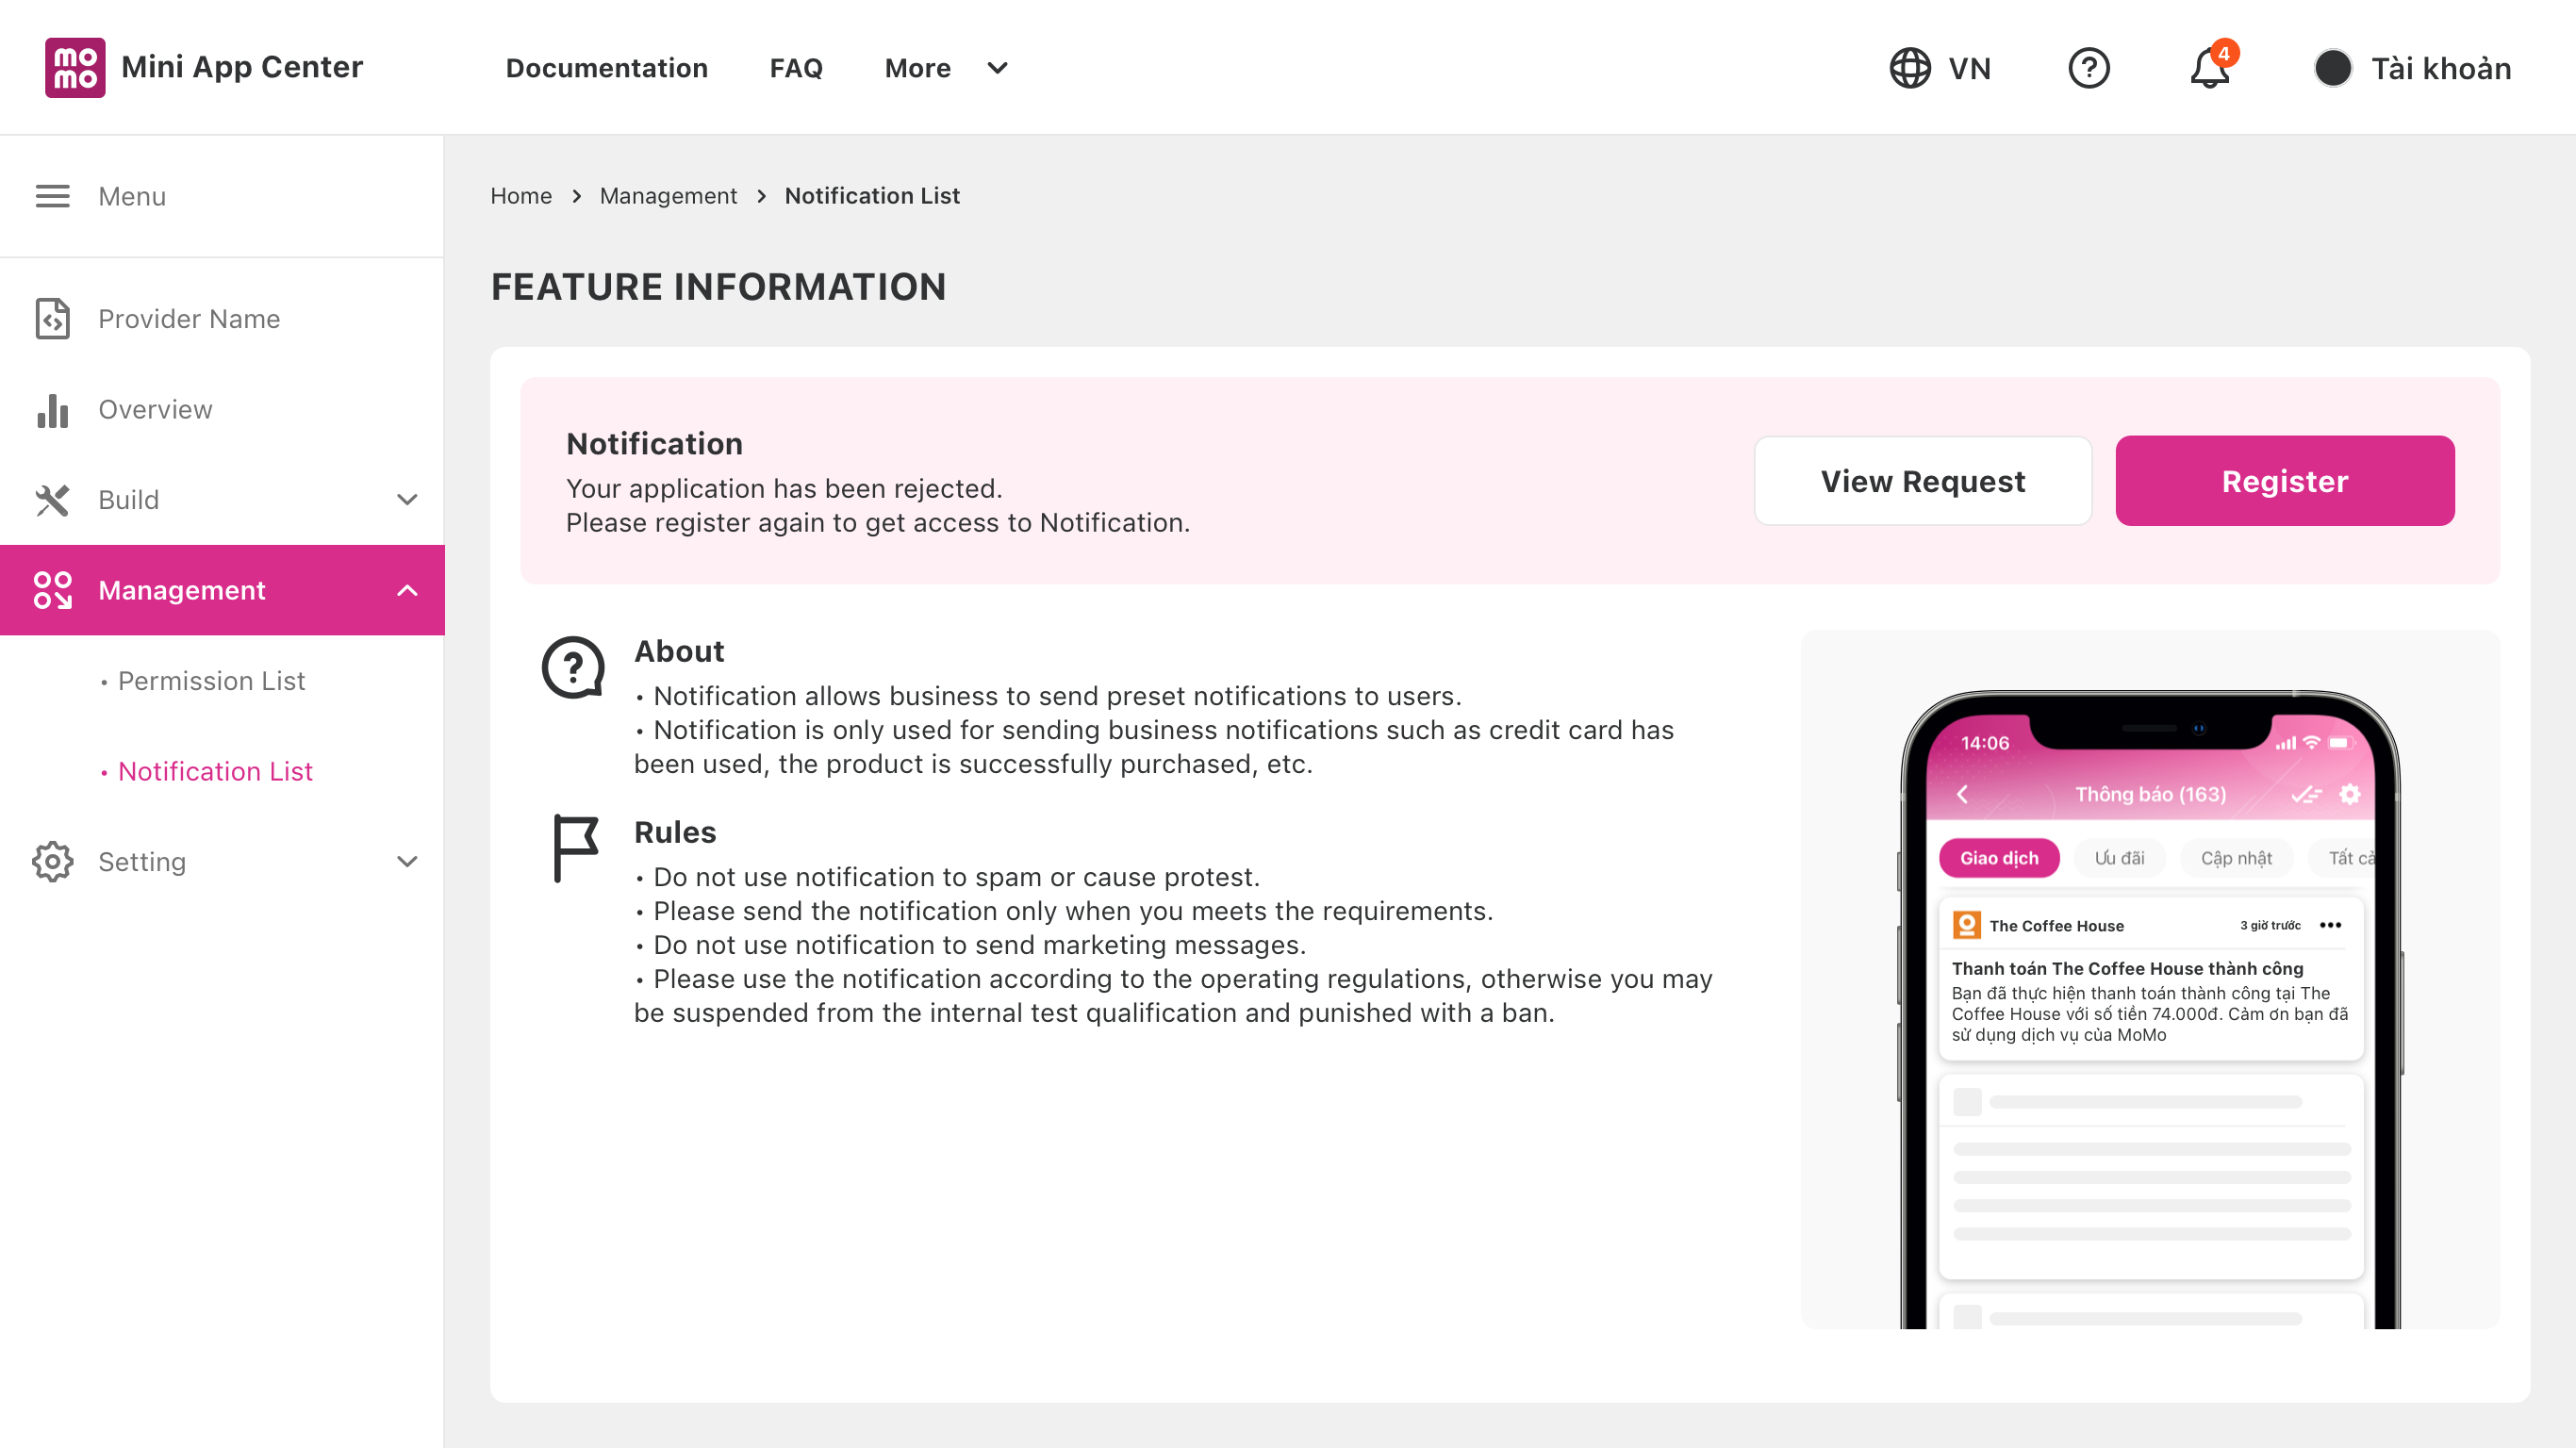
The Notification feature request is rejected
VIEW NOTIFICATION TEMPLATE DETAILS
You can view the notification template details in the All Template and My Template list. The example here will show you how to view the template in the All Template page.
First, access the Mini App Center and open the Mini App Detail page. On the Mini App Detail page, choose Management > Notification List.
In the list, choose View in the Action column to view the details of the template. On this detail page, you can view the general information and technical specifications you will use while using the API to send notifications.
The Notification Template Detail screen will only show TemplateID after the notification template is added.
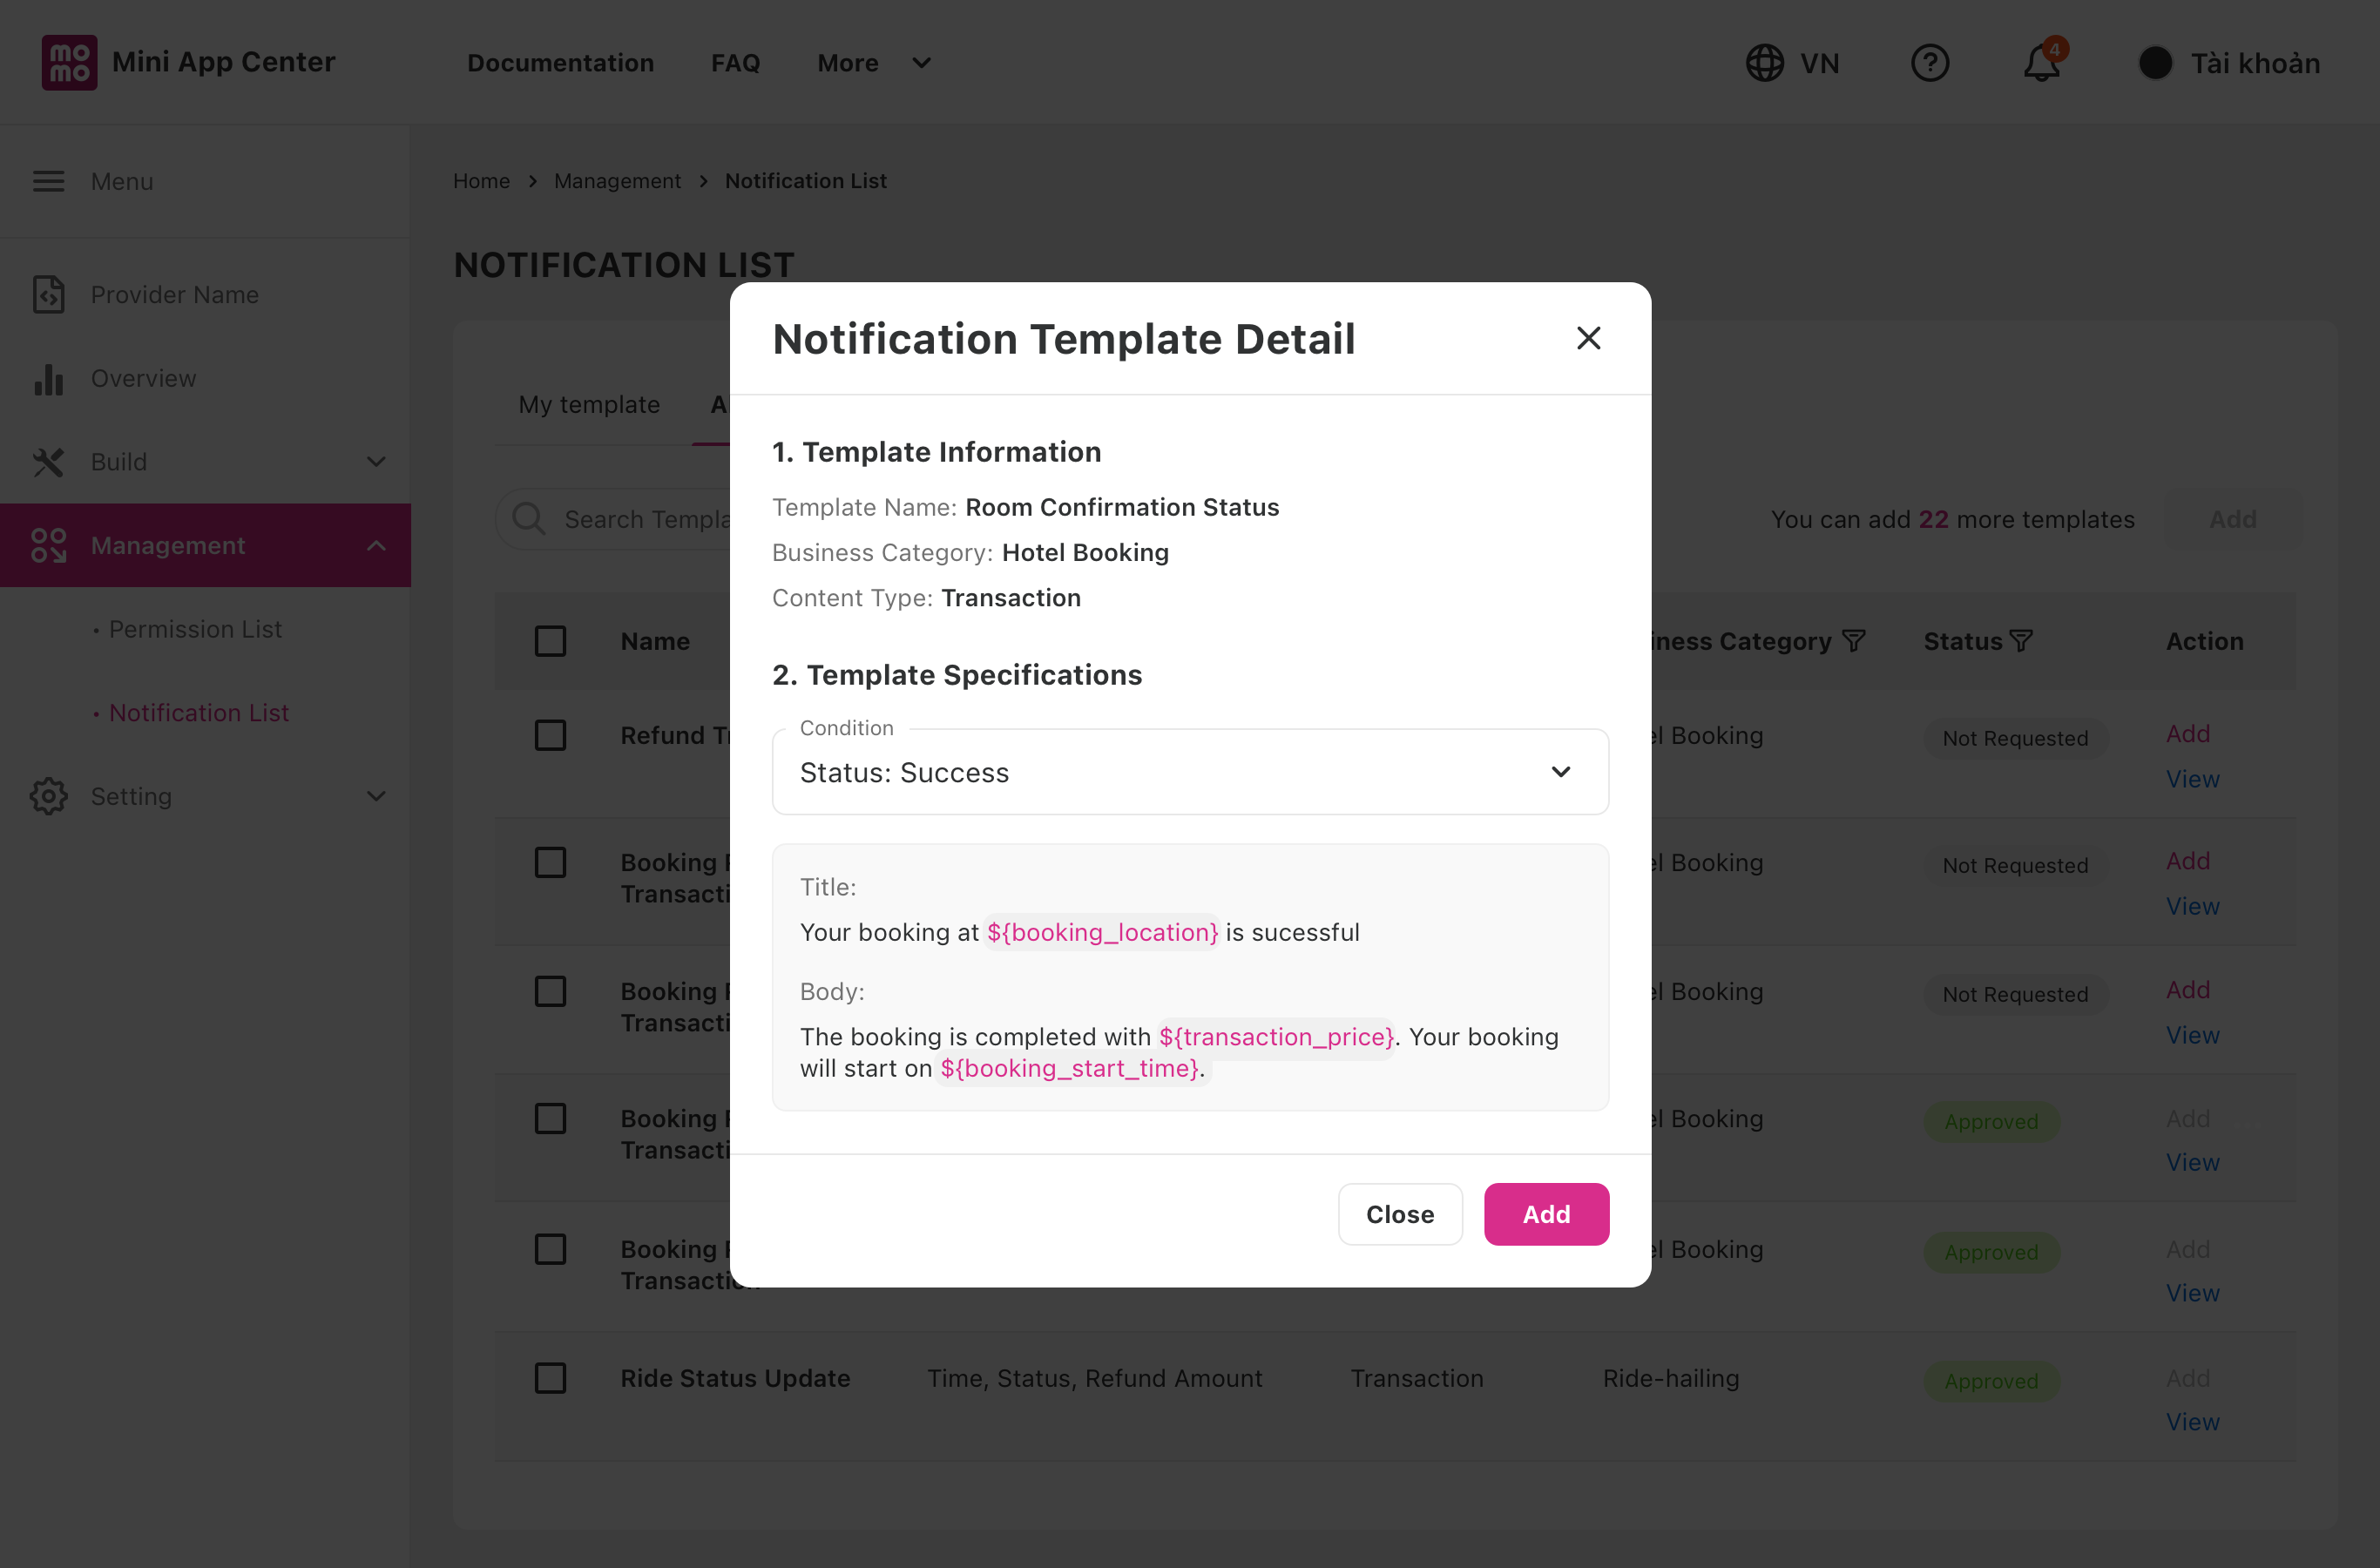
For example, in the image above, the information to be used in the notification API is:
- TemplateID: MINI_APPNF9SB3
- Status name: status
- Status value: success
- Parameters: ${booking_location}, ${transaction_time}, ${booking_start_time}
For more information about sending notifications using these details, please refer to the Send Notification API in the Catalog Functions documents.
ADD NOTIFICATION TEMPLATE
To start using the notification template provided by MoMo, you have to add the template you want to use to your template list.
First, access the Mini App Center and open the Mini App Detail page. On the Mini App Detail page, choose Management > Notification List.
Click Add in the Action column of the notification template you want to use, or choose a list of the template and click the Add button on the top right side of the table.
- The maximum number of templates you can add is 25. You cannot add any more templates if you reach this limit.
- You can see the number of templates you are allowed to add in the top right corner of the All Template table.
REMOVE NOTIFICATION TEMPLATE
Before removing a notification template, ensure your application does not use the removed notification template.
- Make sure you update the app to not use the removed notification template on all app platforms (iOS and Android) and all deploy targets.
- If the removed notification template is requested via the Send Notification API, the request will be denied, and no data will be responded to, which may affect the functionality of the app.
- After removing the template, developers must add it again if they want to use it.
To remove the notification template, go to your Mini App Detail page, and choose Management > Notification List.
Developers have two methods to remove a notification template:
- Method 1: Choose to Remove in the Action column of the template you want to remove.
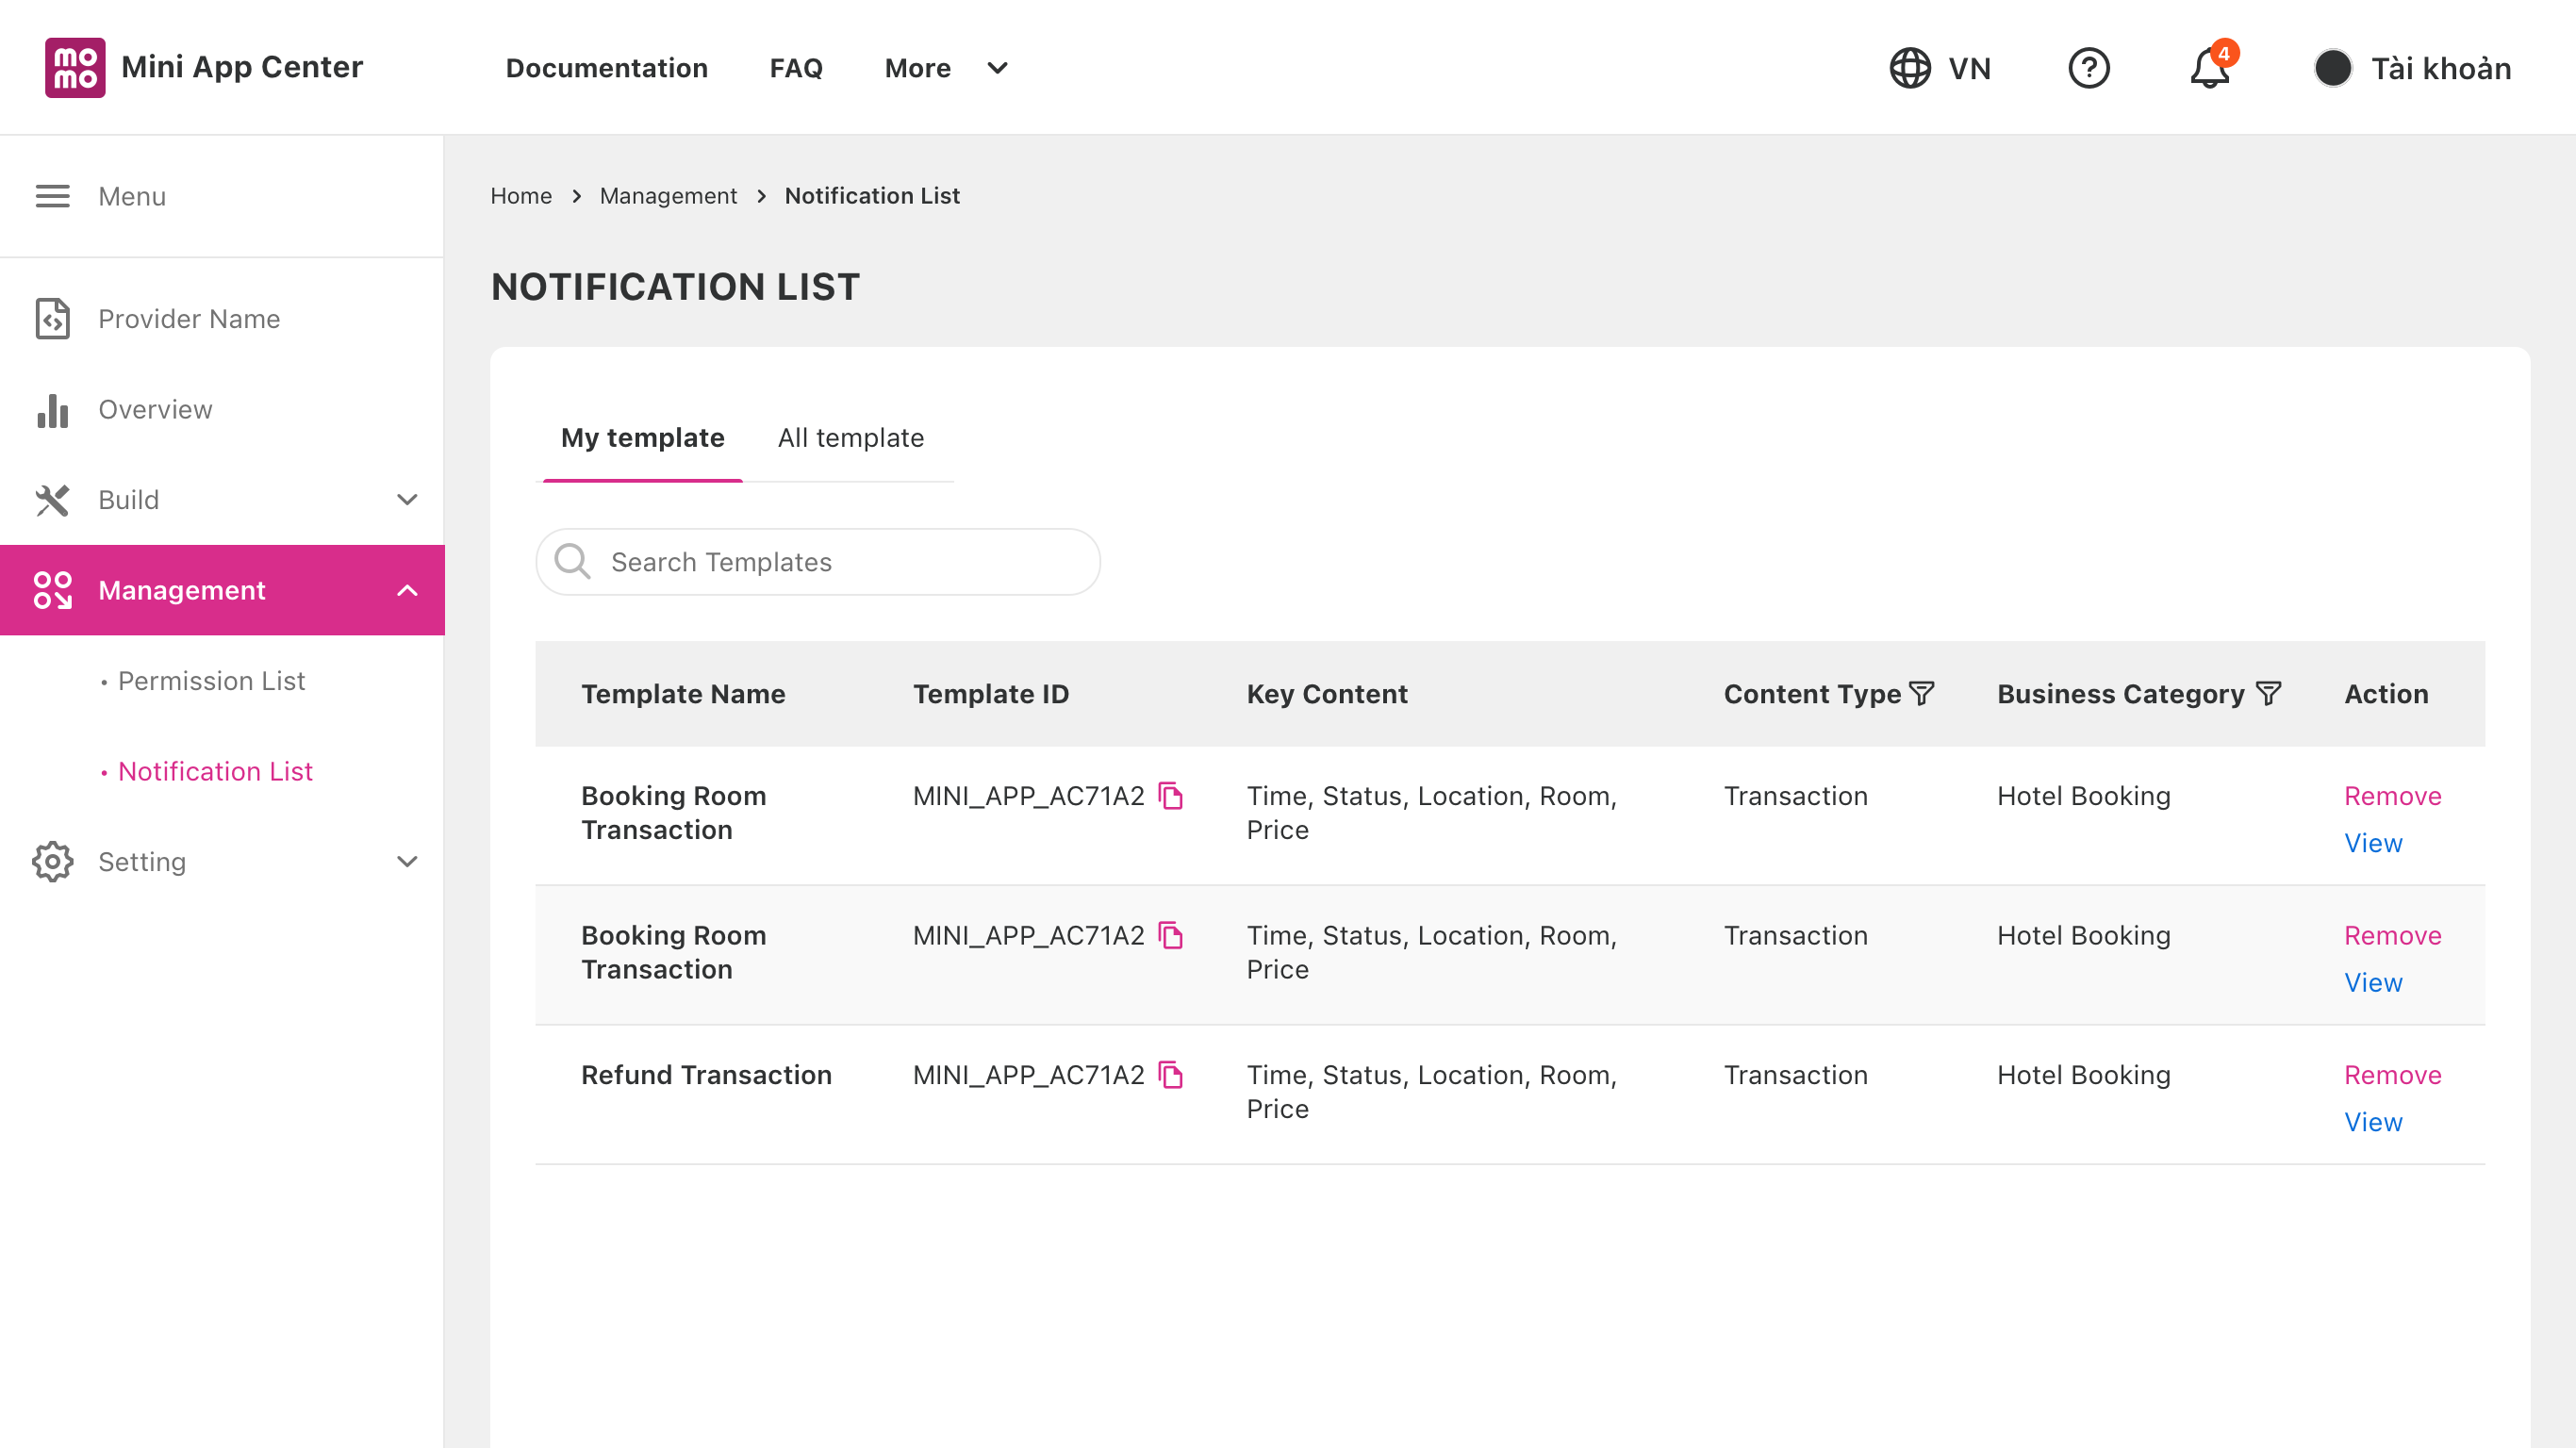
- Method 2: Click View, then choose to Remove Template on the Notification Template Detail page.
After the removal, the respective template will no longer display in the list, and the notification template request via API will not be working.